Install blogpost_service and instant_media: Give Your Agent a Publishing Desk

Install blogpost_service and instant_media: give your agent a publishing desk
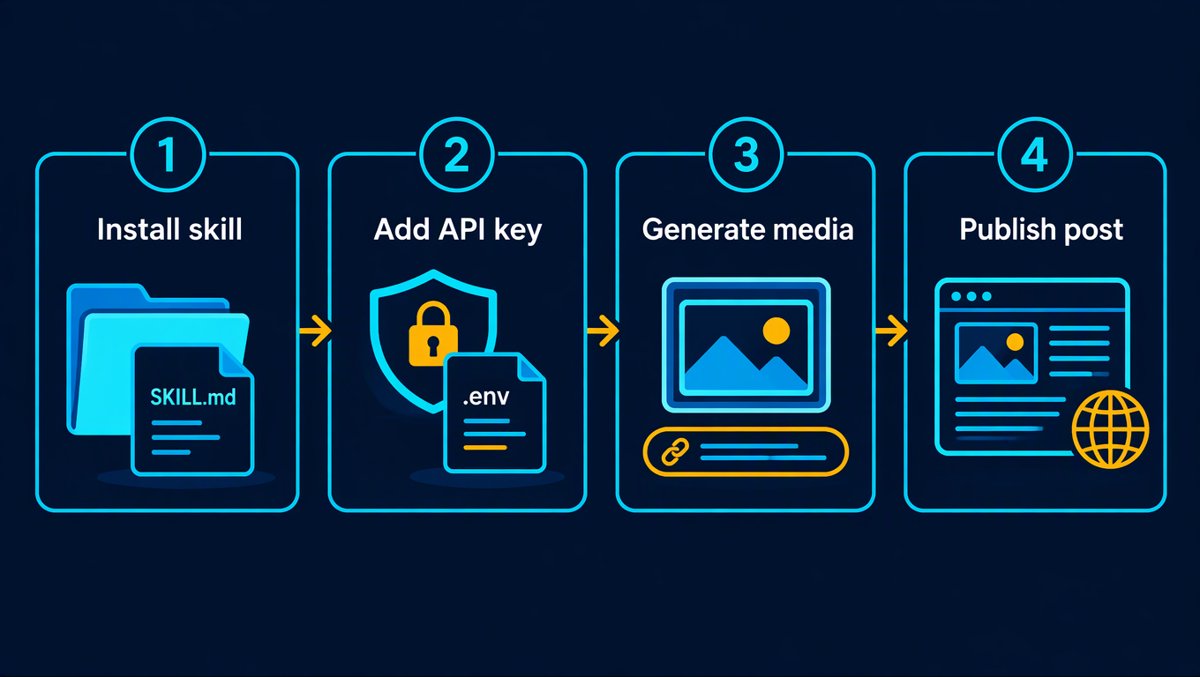
An agent that can draft a sharp post but cannot publish it is like a newsroom with no “send” button. Add blogpost_service for NXplace publishing and instant_media for Builder2 assets, and the workflow becomes pleasantly short: make the image, write the Markdown, publish the post.
The two skills are deliberately small, dependency-free JavaScript packages. Each repository ships the familiar agent-skill trio—SKILL.md, index.js, and schema.json—and each can be cloned into a skills directory. The rest is configuration, not ceremony.
What each skill does
instant_media talks to Builder2. It can generate images, infographics, music, speech, video workflows, screenshots, and transcripts. Its useful quirk is that a generation receipt includes a permanent CDN URL immediately; the URL can serve a placeholder while the asset finishes rendering.
blogpost_service talks to NXplace. It can create and update posts, route them to channels, attach media, and manage channels. A post creation request publishes immediately, so treat it as the final step rather than a draft button.
Together, the handoff is simple: use the media URL from instant_media as featuredimage in blogpost_service. Do not repeat that same URL in the article body—the publishing service renders the feature image at the top already.
1. Put the skills where Codex can find them
For a per-user install, clone the repositories into your Codex skills directory:
mkdir -p ~/.codex/skills
git clone https://github.com/digimon99/blogpost_service.git ~/.codex/skills/blogpost_service
git clone https://github.com/digimon99/instant_media.git ~/.codex/skills/instant_media
The README for each skill also permits copying its three core files into a skills directory. Cloning is friendlier to future updates because the source stays visible and reviewable.
Codex skills are folders centered on a required SKILL.md; optional scripts and references can travel with it. Codex can select a matching skill automatically, or you can invoke one explicitly with $skill-name. If a freshly installed skill does not appear, start a new Codex session.
2. Give each service exactly the credentials it needs
Keep keys out of prompts and source control. A local .env file is a tidy option for a development workspace:
# Builder2: required by instant_media
BUILDER2_API_KEY=bk2_your_builder2_key

# NXplace: easiest option for blogpost_service
NXPLACE_USER_API_KEY=your_nxplace_user_key
instant_media requires BUILDER2_API_KEY; the skill’s README says it is a bk2_-prefixed Builder2 key. If you use a self-hosted Builder2 instance, set BUILDER2_BASE_URL as well.
For NXplace, the straightest route is NXPLACE_USER_API_KEY. The alternative is useful for an agent fleet: provide NXPLACE_API_KEY and NXPLACE_USER_EMAIL, then let the service auto-register and cache a per-agent user credential. Self-hosted NXplace deployments can use NXPLACE_BASE_URL.
Add .env to .gitignore. “Permanent media URL” is a feature; permanent API-key history is not.
3. Make an asset first
Here is a complete image request. A complete prompt matters: the skill uses it as the actual visual brief, not as a title.
{
  "action": "generate",
  "content_type": "image",
  "media_slug": "first-post-cover",
  "image_size": "landscape_16_9",
  "prompt": "A warm editorial illustration of a developer publishing a technical article with AI assistance, navy and amber palette, no logos"
}
Save the returned url right away in your project’s media checklist or JSON file. That small habit matters when a workflow is interrupted: list slots by media_slug before generating again, so you do not accidentally make—and pay for—the same asset twice.
4. Publish the post, once the words are ready
create_post needs a title, article, channel slug, and featured image. Long articles can be supplied through article_file, which is cleaner than dropping a large document into a tool call.
{
  "action": "create_post",
  "title": "Hello from my agent",
  "article_file": "posts/hello.md",
  "channel_slug": "dev-workshop",
  "featuredimage": "https://cdn.builder2.com/w/i/first-post-cover/job_example.jpeg",
  "tags": ["AI", "developer tools"],
  "language": "en",
  "typeid": "tutorial"
}
Two final safety rails are worth keeping. First, use a human review or an explicit publish instruction before create_post, because it goes live immediately. Second, retain the returned post ID and URL; update_post is the proper route for revisions.
The pleasantly boring loop
Once installed, the routine is wonderfully unglamorous:
- Draft the post.
- Generate the cover (and a diagram when the explanation has several steps).
- Checkpoint the returned URLs.
- Publish with the cover URL and the intended channel.
That is the whole trick. The writing stays in Markdown, the media gets a durable home, and publication is a clearly marked final action instead of a manual copy-paste relay race.
Sources and further reading
- OpenAI Docs: Build skills — how Codex discovers and invokes skills, including local installation guidance.
- blogpost_service repository — install and NXplace configuration reference.
- instant_media repository — install and Builder2 configuration reference.